Thursday, September 23, 2010

The Brewery


When I started my brewery, it was simply a beginners kit. All the things you find in your start up pre-boxed kit at the homebrew store. I have managed to amass a small collection of various objects that I feel it necessary to identify for potential future use beyond beginning homebrewing, or just novelty rigs that are fun to historicize in this fairly historical hobby

The Growler -
In the late 1800's and early 1900's, fresh beer was carried from the local pub to one's home by means of a small galvanized pail. Rumor has it that when the beer sloshed around the pail, it created a rumbling sound as the CO2 escaped through the lid, thus the term "Growler" was coined.

Swing Top bottles -
As mentioned and displayed in other parts of this homebrewing blog, there are several different sizes and shapes and closing devices for beer bottles. The swing top bottle is my preferred mode of storing my homebrew because it is an ideal drinking size (450ml-600ml-1litre). These bottles allow for easy open/close when bottling as well as drinking! No need for purchasing caps to fit the bottles or invest in the standard beer bottle capper. However the big dig is the price. Regular beer bottles are everywhere if you look, almost free! But the swing top bottles have an input cost which, in my opinion, is resonable. A company called EZ-Cap out of Alberta sells them bulk for over a dollar a bottle. My method has been to solicit the free listings of Winnipeg and my colleagues. As a fall back though I go to the local liquor store when i can afford it, and buy a 4 pack of Grolsch for just under $15 Canadian - or Fischer (600ml for about $5 per bottle).

Bottle Tree -
This cool, yet easily reproducable, device is a miracle for drying bottles after cleaning/sanitizing. Its a fairly exclusive made in Italy device, yet its just molded plastic with 45 pegs coming out in a radial pattern on 5 different tiers along a center column. Fits both regular beer bottles and swing top sizes...growlers are out of luck. You could make a similar one with as many dowl rods and a 2x2 piece of wood and a drill if you fancied it.

Grain Mill -
This is actually a beef mill, but I figured it could be used for grain too and what a great reclamation of a once butchery device now put to use for the grinding of locally made handcrafted beer to be consumed largely by a vegetarian! Precious symbolism! Now, this device is not that good...if i could be so blunt. It has two different grind plates, one with holes (ground beef?) the other with triangluar fan style openings (fanned beef?). The purpose of milling is not to pulverize the grain, but to just pop the husk as you want the endosperms to stay intact when preparing the mash. I recommend milling at the homebrewstore unless you want to invest in a home mill that utilizes rollering pins rather than grinding plates.

Demijon -
Revel in the size of that honkin thing! Rina's nonu being an avid wine maker, had a few of these. This one somehow ended up at the farm...within my reach! Its about 56Litres! That will hold about 2 1/4 five gallon batches comfortably. I havent gotten the chance to utilize it yet since I dont have a homebrew under my belt that I feel I want 84 Grolsch bottles of yet! When the time comes, I will be enlisting help, as I figure it will require two batches on the stove at once and needing some consistency too! Probably needs about 3 yeast starters...

Hops -
It doesnt have to be all equipment! I started a hops plant back in late may. I got it from a nursery which is never a safe bet because the plant needs to be the female variety to yield, and secondly it takes three seasons before said plant will yield the precious hop flower we as homebrewers are after. Not to mention the fact that these hops could just plain ol' suck! Ive read that wild hops are hit and miss, and these are most likely plantation grown root transplants from a mega nursery that doesnt specialize in strains. Dont get me wrong, if this guy (hoping a girl though) gives me flowers im going to use them!

Mash-tun -
I outlined what the mash-tun is and does in this previous post, but I wanted to dispell any misconceptions of the device from the inside, in case it seemed scary and complicated (as i perceived it before building one). The image here is of the stainless braid that fits snuggly around the 3/4" inside-diameter copper piping, connected with a 3/4" outside-diameter hose clamp. It was quite a pill to squeeze down in the water jug and tighten the clamp, but it had to be done. Now because this device is only held in with a fairly old drilled rubber stopper, its best to hold the stopper in place when pouring the strike water because if you have a leak, its gonna be a sticky near-boiling mess that no-one is going to want to drink if you decide to power through.

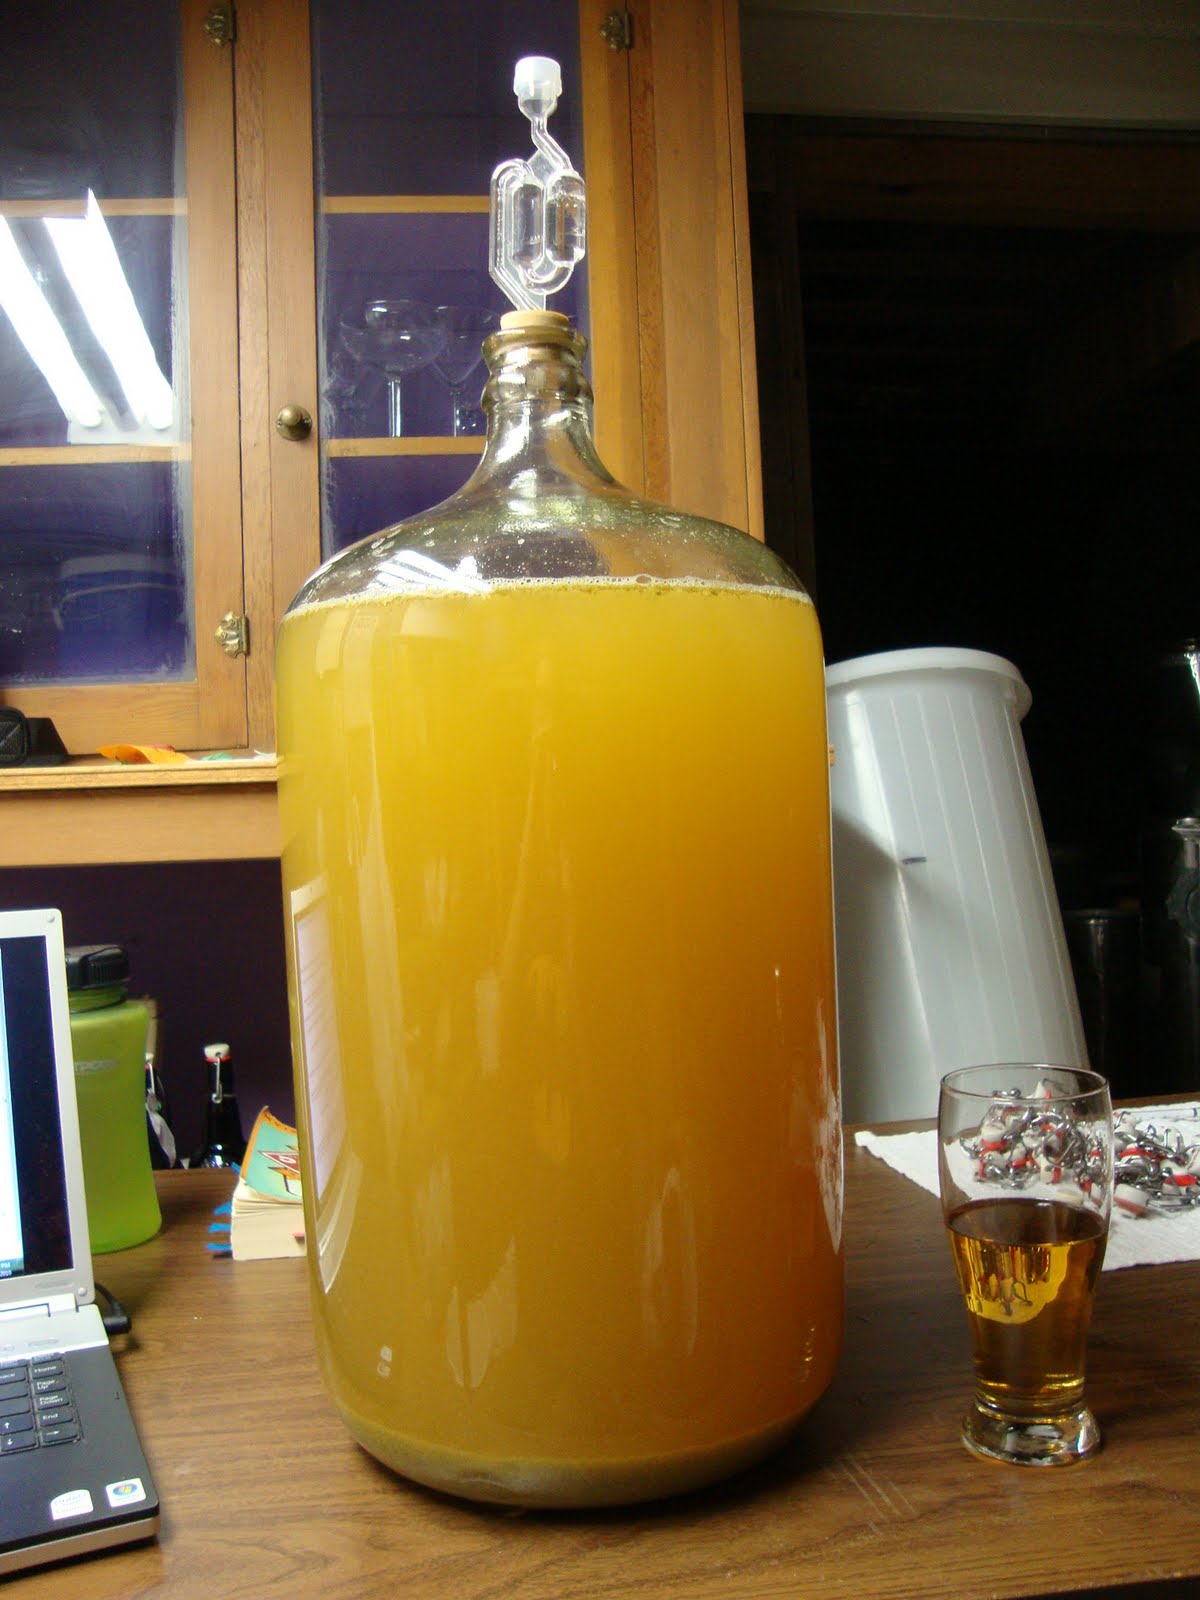
These are a few of the devices, aside from the basic rigs like glass carboys and airlocks, that I have accumulated over the last 6 months that I have been brewing!

Wednesday, September 22, 2010

816 Redditt Weizen

At last, the impending step towards self-sufficiency: using well water. At Rina's farm, drinking water is brought in by the bottle from the town's municipal taps. They have a fully functioning well, but as the taste goes, the majority prefer not to drink it. My goal was to move closer towards a sustainable brewing process whereby the resources I would draw upon would be both local and cost efficient. Beer being over 90% H20, it seemed the logical step to utilize what was available in spades.

Aplty named after the location of this foray into well brewing, 816 Redditt Weizen is my first attempt at a wheat beer. The image at left is more a demonstration of what crazy colors come out of different strains of hops, but the purple coming from the boiling of the Saaz hops was a new experience to say the least. Note, these hops are green in color before mixing into the boiling wort, so I don't really know if there's a chemical reaction happening to cause this or if they just turn purple when diluted. This was another all-grain batch, utilizing my mash tun which is working like a champ. The only other notable occurance during the brewing of this batch was the extreeeeme amount of activity happening in the primary carboy about 10 hours after pitching the yeast. The yeast was going absolute bonkers inside the primary, quite amazing to watch as there was no external anything stirring the batch, and yet it looked like it could power a turbine just by the amount of self-propelled mixing going on. Just below, is a picture of the blow off hose I had attached, and obviously the fermentation was strong enough to need it.

This batch was bottled last weekend, and yielded slightly less than an average 5 gallon batch: 29 Grolsch bottles and 1 3litre Rossi jug. I purposely made less because I wanted to utilize the "new" 20litre green carboys that I had picked up off of kijiji along side a whole lot of retired fermentation gear for a very reasonable price. The woman I bought the stuff from had made wine for 20 or so years and decided she was moving to Okanagan Valley, British Columbia (thats wine country folks) so she wouldn't be needing her rigs. After bottling, the taste in the gravity test tube was so-so. Had an acquired taste, but if the riddle of fermentation is good beer, I think I'm in for a surprise!

Tuesday, September 21, 2010

The Old Firm Derby


A match-up of legendary football proportions, Glasgow Rangers versus Glasgow Celtic. Well worthy of a Scottish Ale named after it. After brewing the all-grain IPA batch the previous weekend, I decided to go back to a liquid malt extract recipe in case i needed a beer to cry into if the IPA didn't work out. However, I did select the grains to use in this batch rather than purchasing a pre-measured and milled variety (at left are two different types of malted barley divided into three jars: Crystal Malt and Toasted Cara-pils Barley).

The title of the beer is The Old Firm Scottish 70 Shilling. There are three or more different types of Scottish ales, each denoted by their alcohol strength in shillings (abbreviated with a forward slash /): Light 60/ (3.5%), Heavy 70/ (3.5-4%), Export 80/(4-5.5%) and Wee heavy 90/(6% and up). This being my first foray into the category of English ales, which any self-respecting Scot would have a problem with its inclusion into that category I'm sure, I decided to use the malt extract and the medium choice of the 70/. This batch was a return to the regular schedule of brewing, uncomplicated and straight forward. You can see the nice brown color it produced, largely due to the light malt extract used. As suggested by the style, the alcohol content was not strong.

At right is the primary fermenter with a blow-off hose attached, which is submerged in a jar with water. In an effort to always improve my condition as DIY as possible, i built a carboy shuttle which is essentially a milk crate that has a busted out bottom, destined for the dump, with a board cut to size to fit the measurements of the crate, and four office chair wheels bolted into the bottom. One of the wheels only goes forward and backwards whereas the other three have swiveling brackets, so its not 100%, but it does the job of sparing my back and avoiding dropping the whole thing on the basement floor. It also helps keep sediment in place when im moving it from the cellar to the brewery just before racking.
This Scottish 70/ came out with a cider'ish flavor. Very tasty and sweet, we drank a glassful of the young beer right out of the secondary fermenter, just needed carbonation. The batch yielded 29 Grolsch bottles and 1 5 litre cider jug. Waiting in anticipation to taste The Old Firm.

Monday, September 20, 2010

India Pale Ales

India Pale Ale, what can I say?
You are the best. Your light color yet bold aroma, your sharp yet comforting bitterness tells me you're beer, and your healthy alcohol content always sets you aside from the "other." As a practicing hophead, over two weekends, I brewed two batches of India Pale Ale. One was a simple bladder and pitch, the other my first all grain recipe:

1. In a time of need, I decided to splurge (35$) on another bladder of BrewHouse. There was company in town, including one small inquisitive earth child (literally named Gaia), which made me take the easy road by fermenting this no frill's kit. At the same time, I needed beer that I was just wanting to drink, and my favorite style being IPA led me to this easy option. My first IPA kit, the rat tail, was okay, but it was my first, and everyone has their first. This simple procedure, as explained here, was well worth it as the resulting beer only a month later was as good as any IPA i could get at my local LC. I brought a Rossi jug worth out to a friend's camp on the lake and it was a hit with all participating tasters.
At first glance (right), this could be mistaken for a scene from Alien, but upon further inspection, its the kreusening that reached the bottom of the bung in the secondary! These kits really have some strong activity, leading me to believe that it equates to the consistent finish.

2. My first all grain batch required some DIY equipment. Firstly, what I mean by all grain is simply this: all grain homebrews require no malt extract, a lot of grain (roughly 10lbs/5 gallons of beer) and the means to extract sugars from the starch so that the yeast can digest it into alcohol. Ever since running into a few snap-headaches during the Oatmeal Stout partial mash recipe, particularly regarding my smallish brew pot and no easy way to deal with sacks of scorching hot grain, I decided to invest in the process. Secondly, what I mean by DIY equipment can be seen (left) next to my brew pot ready to take on the strike water (160F water for steeping the grain in) before sparging (rinsing) into the brewpot. Inside this 5 gallon water cooler (food grade plastic good up to 140F) is a stainless steel braid (from plumbing parts) which holds back the milled barley and allows the sweet mash to pour out that copper pipe and plumbing hose. Effectively separating the sugary liquid from the raw product - resulting in bye bye extract (only saves me about 10 dollars per batch without the extract - but its more engaging this way).

This recipe was as simplistic as I could get (10lbs of 2-row malted barley from my neck of the north, and a heavy hopping schedule utilizing 2oz Palisade 2oz Cascade), my goal was to test the procedure of the all-grain and measure its results. My synthesis revealed a process that effectively beats extract brewing in my opinion. The hands on feel, the smells, the activities, the measurements really create a more precise beer. Its not easy, in fact it's hot as hell and precarious! But the result is something that speaks about imperfection and yet labor through craft in the same sip. In addition to this being my first all-grain batch, I also decided to double the pleasure by trying out "dry hopping" on this ol' boy (3oz of Palisade). Dry hopping is the process by which you apply hops to the secondary fermenter and let the young beer get even more aroma and bitterness through aging directly with the hops (in this case pellets, but whole hop flowers are recommended).

The result? The yellowest non-lemonade beverage I have ever seen. Taste? Its not the best IPA ive had (I brewed it on August 7th, and just now - September 20th- as of the two week bottle conditioning), doesnt come even close to the BrewHouse batch. But yet I didnt use potassium bicarbonate to activate it, didnt use a concentrated pre-packaged malt extract made of grains that i didnt actually run my hands through or smell as it got adjusted to the strike water. Will it get better with age? yes! Will I get better at all-grain brewing? "Its a definite maybe." Will I use something other than the one single type of bland malted barley? have done and will do!

The coup de grace, I named this hand crafted delight in the tradition of my nerdy logic: Isildur's Bane. It's Isildur's bane - the One Ring from Tolkien's Lord of the Rings - because it is as yellow as gold; its the bane of my existence because I love IPA more than any of the beer styles; lastly, perhaps beer should be done away with entirely as it prevents real action by the masses on both a political, philosophical and economic level when consumed beyond composure (said without a hint of seriousness, but with all caution). As a slogan on a future label when I sell my first born to improve the brewery, it will read "Cast me into the Fire!"

Coffee Porter & Oatmeal Stout


Northern Brewer Beer Kits, ah the selection! While home I managed to convince my dad that brewing was a good idea. Convinced him so much so that he took up the hobby within the first week of my arrival. His first batch, which I played assistant brewer for, was a Northern Brewer Peace Coffee Porter. His setup is much easier to get engaged in the hobby as he has ample light and counter space. We also were helping each other remember to follow steps (and drink beer) during the process which I have not yet had any regular help with. The brewing went off without a hitch. We followed his kit instructions to a near T, and utilized the equipment he had. One hangup we found in the process was the application of ground Peace Coffee to the secondary fermenter about 2 weeks in. Our wort level was way too high to include the entire bag of coffee. Yet, we kept pushing it down and letting the beer sop up as much grounds as possible. As usual, LISTEN TO THE BEER! We should have stopped with what we could comfortably apply as the porter (I've heard) still tastes like watered down coffee. As you can see (right), the coffee was as close to the overflow line as you can get. We finally had to thief some out in order to make the levels adequate. Despite this, it was a first batch, I had never applied anything to the secondary fermenter at that point so I was also learning from the process. For a first batch, he was pleased with the resulting head at about 3 months of bottle conditioning.


Upon my return from Minnesota, I began a tear into the homebrewing hobby. For the next 2 months I would brew a new batch every weekend. Currently I am sitting at 150 Grolsch (450ml) bottles, 5 Fischer (650ml) bottles and 3 growlers deep in beer. (This is my new Avinator in action, its...the best)
Back to the Norther Brewer Kits. I hauled across the border an Oatmeal Stout kit (among other brewing paraphernalia). I was keen to get into it, as Norther Brewer effectively kicks the supply-shelves-ass of my local brew shop, Grape and Grain (or so I thought). But this is merely an economy of scale. The kit itself required a partial mash technique, my first foray into mashing. As you can see at left, it required a lot of grain - thus it needs to be mashed on a higher scale than simply steeping a small sack in the brew pot. Solution without a mash-tun? Wrapping the brew pot, full of near boiling water and those three full-grain sacks, in two raggedy ass blankets and leaving on the kitchen floor for a half hour. It wont always look glamorously proletarian or masculine, folks.

The brewing process was standard otherwise. However, what was not standard to me thus far, is the pitch black color that the malts created! Love that midnight plunge. The stout has very poor head retention at the 2week bottle condition mark (and thats after a month and change from brew day). The initial flavor (the nose?) is not developed, it seems watery...AS my dads porter is. Now, im not saying its the kits, as we may have chinced out on the body by using grain sacks, or hop socks, not enough yeast activity in the primary, but I am making the statement about the uncanny'ness of two kits having the same imperfection. However, having said that, the finish is amazingly oaty, almost a roasted oatmeal flavor! Keeping the lot in storage for now.

Tuesday, September 7, 2010

Spruce Beer


This was the other beer brewed before my summer vacay. This one deserves the same salvo I give in person - The historical origins of this beer, for me, lie in the colonial United States pre-revolutionary war of 1776. Most of the founding fathers, commoners, townsfolk, blacksmiths, town cryer and many other stations of people, brewed their own beer. England having a longer and richer history of ale, had progressed in their hop growing moreso than the scant wild hops that mostly grow in wetter climates of northwestern North America not yet colonized. In rebellion to the hegemonic taxation without representation of the british empire imposed on colonial markets, hops included, the brewers said Basta! to the leafy green flower and venceremos! to the needly green pine. Spring growth of the white spruce tree was harvested and functioned as both a preservative (as hops is) and a flavoring agent. In my attempts to utilize the natural surroundings of a northwestern Ontario hobby farm, I decided to don this rebellious spirit and brew a Spruce beer.

The process was quite rewarding as most new experiences in homebrewing are. The smells, the colors of the wort, the additions to the boil making the process more engaging all the time. This recipe called for no specialty grains and about 6 bags of 500gram dark DME (dry malt extract) which was fairly costly as my brew shop doesn't sell the cheaper dark LME. Hallertauer hops were added for finishing aroma to help even out the spruce. Perhaps I will do full spruce and no hops next time. The brewing produced a very rich gingerbread smell that I haven't smelled since, with other recipes.

Like the Anchor Steem, this beer sat for about 2 months. At the right, you can see the mild trube that built at the top, but also, the trub settled around the ridges in the Italian made carboy. I prefer the Mexican glass carboys for this very reason. The wort was left on its trub for the entire 2 months. This batch is the only one to date that has not "worked" and this leaving on the trub could be one of many things that resulted in it failing. The beer was mixed with 1 1/2 cups of dextrose (the recommended for regular ales is 3/4 cup) before bottling as my homebrew store indicates on their dextrose packages. Even with this much priming sugar, the beer had absolutely no head. It tasted like sweet tea with a bit of sourness, almost as if it was still wort and no fermentation had occurred.

As hard as it was, the lot of it ended up in this garbage can shortly after. I was not pleased with the 2 week outcome, even with only a few batches under my belt I know when something is not beer or completely lacks all beer elements - this did. I saved two bottles and have tried adding dried yeast to them and will wait and see if the sugar gets eaten.

Anchor "Steem"


Having planned a trip to return home for the 2010 World Cup, I decided to brew a few batches before June so that I could come back having left them to ferment for over a month. One of them was this LME (liquid malt extract) kit beer intentionally named Anchor Steem after the famous, and copyright attentive, Anchor Steam out of San Francisco (one of oldest breweries in America, 1849). Yes, if you can imagine, the beer industry too is heavily protective of its image and capital heavy branding (look no further than to my father and my uncle who have been coming up with "new" ways to get their budmiller into the others glass for the last 30 years).

Anchor Steam itself is a very hoppy beer and light as any pale ale. However, my mild bastardization of the original recipe - be it due to the kit's ingredients, or my adding 1 1/2 cups of priming dextrose to the bottling process - the end result after 3 months has still produced a drastically sweeter beer with little to no hop bitterness. The image to the right is of my hop socks after the boil and the yeast starter on the right. The hop socks have brought mixed results. In this beer, I should not have used them as a fuller flavored boiling hop would have extracted more rigorously had it been loose in the pot. With the sock, it balls the hop pellets as they break down, often leaving the inner core of the ball as green as they were in their package. However beers with less hoppy flavors, like stouts, would do well with hop socks because of the desired subtly of bitterness. This beer in particular tasted as if there was little to no hops added.

Because I was not going to check up on the fermentation for about two months, I transferred the beer from the primary into a secondary, as seen at right. The thick layer of brown on the higher carboy is called trub (pronounced: trube), its a build-up leftover from the Kreusening (pronounced: croy-zun-ing) process where fermentation causes the "blow off" of foam, hop resins and dead yeast. This is why you use a larger primary than your secondary, because of the rising level of the material contained in the carboy. This batch had a very low amount of trub which is an indicator of something, not 100% sure of what. The photo at the right makes the beer look much darker than it is. Up close with a back lighting as seen at left during the racking process, you can see just how light this beer is.

I have received largely positive reviews of this recipe, primarily by girls who like lighter and sweeter styles with absolutely no bitterness. I discovered with this batch, just how badass it feels to walk into a party with a growler and pour out the alcoholic fruits of ones labor.

Friday, September 3, 2010

Munich Dark Lager

This brew (my second) was a kit beer in the most general sense: it was wort in a bag...All you had to do was pour the bladder into the primary, top with water to make 5 gallons and make the yeast starter and pitch. I tried a Munich dark lager because I knew that I didnt have the capability to lager anything more advanced without ample fridge space, and I also wanted to make sure I had something drinkable to show for my efforts in case the Rat's Tail didnt turn out (luckily they both did).

I do recommend this brand of beer-in-a-bag as it was very tasty and has gotten very good reviews from those i have passed it on to. If this type of homebrew is anything, its a lesson in cold side homebrewing. Fermenting in the primary, racking to the secondary, fermenting longer, then mixing the dextrose and bottling. Its easy enough to not come out completely disappointed, but at the same time it requires a chemical "activation" by adding a potassium bicarbonate pack to the wort prior to yeast pitching. This is not any more toxic than baking soda but the goal for me is to be as sustainable and basically pure in ingredients as possible. I recommend the kit as an example of what can be made in the home brewery.

Wednesday, September 1, 2010

Rat Tail India Pale Ale

This was the first batch of homebrew to hit the house, and boy did it start an addiction. A "Scotty's Kit" extract recipe for an India Pale Ale. I had help, with co-brewer Chris to lend a hand.Thanks for the siphon technique chris! However, it wasnt all smooth sailing as can be expected from the first batch. Although mildy-academic approaches were used in researching this hobby before jumping right in, I failed to accomadate the poor yeasts in their sugar crazed hunger to expand in the carboy.

Luckily I had brewed on saturday, and was still there to clean up the mess sunday morning. However those few hours that the beer was exposed to the air (because the bung eventually blew out the top) the IPA had a noticeable off flavor. I have since brewed two other IPA's and will have a range for which I can judge this first batch. For a first go around, however, I was very pleased with results as it was both appropriately bitter and amber in color. And it was very drinkable!